In this tutorial, I’m going to I am going to show you how to shorten sleeves on a lined jacket.
These are the step-by-step instructions. If you prefer the video tutorial, scroll down to the bottom of this page.
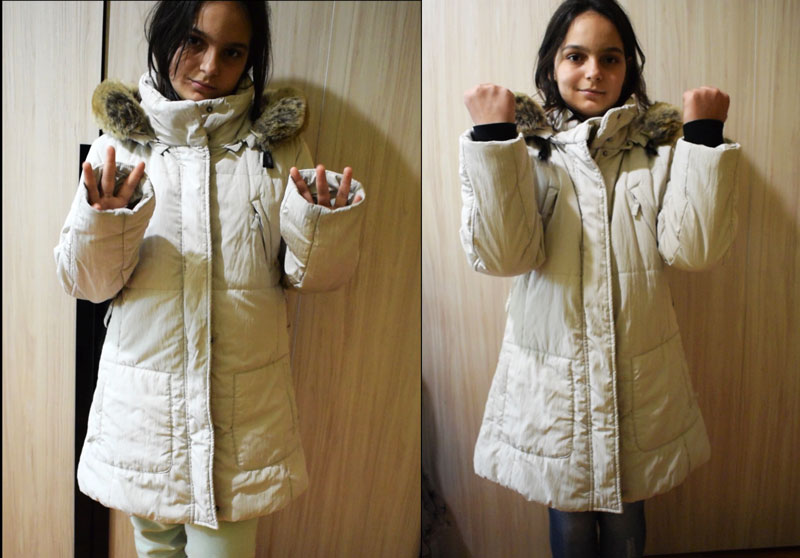
Here is the jacket I’m going to be working on. I’ve trifted this jacket for my daughter and noticed that the sleeves are very long for her.
I believe they were meant to be worn folded and I would leave them like this, but they are also stained and looking dirty at the ends.
And that’s why I think shortening the sleeves is the perfect solution here.
Measuring how much I need to shorten the sleeves with
To begin with, I measure how much shorter I want the sleeves while she was still wearing the jacket. It turned out to be exactly the size of this main fabric cuff, so I am going to use it as a guide (image 1).
For almost any alteration you need to make on a lined coat or jacket, you need to work from the inside out. That’s how the jacket was manufactured. And usually, there is a hole left in one of the sleeve’s lining (image 2).
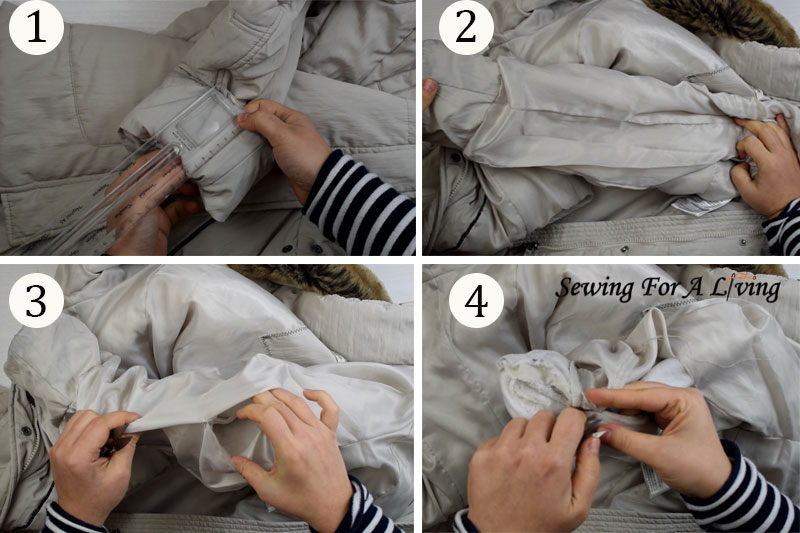
Open the hole by breaking the topstitch it was closed with (image 3). Let’s see what we are about to deal with. The lining was caught to the main sleeve so that it doesn’t show when you wear it.
I am going to remove these little strips of fabric. This will release the area I am going to be working on (image 4).
You might find a different situation here. For example, the lining might not be fixed, there might be some reinforcement at the hemline or buttons. In that case, I always try to follow the order the piece I’m working on was manufactured. Because this usually gives the best results.
Shortening the sleeves
First, I am marking the amount I need to shorten on one side of the sleeve – the main or the lining, it doesn’t matter (image 5). I pick the one that is easier to work on. Here, it would be harder to mark on the batting, so I am choosing to mark on the lining.
Plus, I need to shorten with the size of the piece exactly, so I’m not even going to mark. I am going to use the seam as a guide.

Then I am folding the sleeve like this (image 6) so that both layers form something like a cuff (image 7). Then I am going to pin them together, fold the same amount of the main and the lining sleeve (image 8), and make a seam at the mark (image 9).
In my case, I have to shorten a lot and it is going to be a bit harder to insert into the machine. In most cases sleeves need to be shortened significantly less, so it’s easier to sew.
I like to do the sleeves like this for a couple of reasons. First, I mark only on one layer of the sleeve.
Second, the lining stays exactly where it is supposed to. When I completely detach the lining from the main sleeve it sometimes gets twisted. This makes it harder to adjust it while the whole jacket is inside out through that same sleeve or even the other one.
And last but not least, I have the chance to check if the sleeve fits right before I cut.
Sewing the sleeves shorter
I go and sew at my mark (image 9).
This is what it’s supposed to look like. It’s like the seam allowance is wider (image 10) and the excess fabric on both layers of the sleeve is locked with the seam we just made (image 11).

I am going to go and turn the sleeve inside out in order to check what I’ve done and possibly try it on. And if I am happy with the results, I am going to turn it inside out once again and finish.
Cut the excess and close the sleeve
First, I cut the excess (image 12). I want to leave a seam allowance of ¾ inches or 2 cm.
I am measuring down from my new seam, marking and then cutting it out.
And this sleeve is pretty much done. We need to fix the lining to the main sleeve with a couple of stitches so that it doesn’t show (image 13).
They’ve used strips of fabric and I am going to use them as well. That’s because we don’t want the sleeve completely restricted and the strips allow for some movement (image 14).
I am going to hand stitch them back, folding the sleeve at the hemline and pulling just a bit up so that it holds the lining tucked in. Nothing crazy, just a couple of millimeters.

I am turning it out once again to see if I like it and I do, so I am going to continue with the second sleeve (image 15).
When I’m done with both sleeves I flip the jacket outside in and I close the hole in the sleeve with a narrow topstitch seam (image 16).
And that’s pretty much all there is to it.

Like what you read here? Support my site
If you would like to help me continue delivering similar content, please consider buying me a coffee to keep it going. It really helps me focus and have more time to prepare these tutorials and develop my lessons.
I can devote more time and do all the things involved in order to make this happen and share with you what I’ve learned about sewing and pattern making.
I would really appreciate it.
Watch the video tutorial on how to shorten sleeves on a lined jacket or coat:
If you use any of my tutorials, tag me on Instagram at @sewingforaliving, so I can see it and love it.
More sewing tutorials:
If you like what you read here, join our mailing list so we can send you our new sewing tutorials, pattern-making lessons, and patterns, as well as some occasional offers that we think, might interest you!
- How to replace the zipper on a jacket
- How to sew buttons and buttonholes
- Free online sewing classes for beginners
- How to sew an invisible zipper on a dress
- Sewing with elastic thread – make a shirred dress
SIGN UP FOR SEWING FOR A LIVING NEWSLETTER
If you like what you read here, join our mailing list so we can send you our new sewing tutorials, pattern-making lessons, and patterns, as well as some occasional offers that we think, might interest you!
We will protect and use your data in accordance with our Privacy policy.
You may unsubscribe at any time by clicking the link in the emails we send.
Pingback: Shorten Sleeves On A Coat With Lining – Sewing Tutorial • 08/06/2021 • DIY & Crafts
Pingback: Shorten Sleeves on a Coat with Lining – Sewing Tutorial – Sewing – The-Crafty-Dad
Pingback: Shorten Sleeves on a Coat with Lining – Stitching Tutorial – Stitching | Pure Profitz
Pingback: Shorten Sleeves on a Coat with Lining – Sewing Tutorial – Sewing – Household Attire
Pingback: Shorten Sleeves on a Coat with Lining – Stitching Educational – Stitching – smartchoiceafrica.com