In this post, I’m going to show you how to sew belt loops to a dress.
It’s almost the same technique I use to add belt loops to a waistband of pants or skirts. There is a small difference, which I am going to explain below. If you prefer to watch the video, scroll down to the bottom of the page.
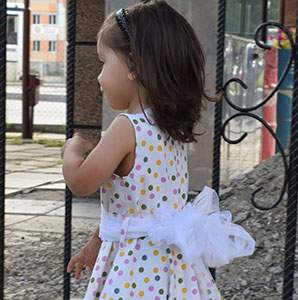
In this example, I added only two belt loops over the side seams. This is because the belt has only decorative function here and doesn’t need a lot of support.
On a waistband, there are usually 5 belt loops – 2 at the front sides, two at the back sides and one at the center back.
How to make the belt loops
To make the belt loops, cut a longer vertical piece of fabric. For example, if you want to put 5 belt loops 2 inches each, cut the string at least 15 inches long so that you have the length plus ⅜ of an inch or 1 cm seam allowance on each side.
The width of the string depends on the width of the belt loops you want to make. It should be twice the width of the finished belt loop plus seam allowances on both sides (image 1).
Fold the fabric in half wrong sides together (image 2) and press it all the way down (image 3). When done, it should look like this (image 4).

Fold (image 5) and press the seam allowance in (image 6). I want my belt loops to be ⅜ of an inch or 1 cm wide, so the seam allowance is going all the way in to the middle fold.
Hold the belt loop string folded in (image 7) and pin all the way down (image 8).

Sew the belt loop string with two parallel stitches. I like to do this on the coverstitch machine. You can also use a twin needle. This way you are going to sew the belt loop with only one seam.
I assume that not everyone can use those, so I am going to use the regular straight stitch.
First, I’m going to make the outer seam (image 9). This fixes the edges in place and I don’t have to rip both seams if the seam allowance get twisted or if I don’t make the perfect straight seam at an even distance from the edge (image 10).
Then make the second stitch (image 11). Be careful to make it parallel to the first and also at the same distance of the edge.
It starts to look like the actual thing already (image 12). Now let’s sew the belt loops to the dress.

Determine the size of the belt loops
I’m going to put only two belt loops at both side seams and at the level of the waistline seam.
I eyeball the size of the belt loops, because in my case it doesn’t matter that much (image 13). If you are adding belt loops to a waistband, you should measure the size of the band and cut the belt loops accordingly (including the seam allowance).
If you have a particular belt to wear the garment with, consider the width of that belt to match the size of the belt loops.
Cut the edge of the belt loop string so that you start with straight edges (image 14). Once I’m happy with the size of my belt loop, I am going to use it as a pattern for others (image 15).

Attach the belt loops to the garment
I am going to measure the middle of my belt loop because I want it to match the waistline seam (image 16). If you are making belt loops for a waistband you can skip this step. Next, put the seam allowance under (image 17) and flip the belt loop over (image 18).
I do this to mark the right position (image 19). You don’t need to do all this if the belt loops are to be put on a waistband. Then, sew it in place (image 20). Sew at 3/8 of an inch (1 cm) seam allowance.

Flip it over again (image 21) and tuck the seam allowance under (image 22). Be careful to put it straight.
This time sew on the face side (image 23). This time sew closer to the edge so that the seam allowance stays under.

And here it is (image 24). It should not be too tight and not too loose. There should be just enough space to insert the belt in.
Often and especially on jeans, there are two belt loops right next to each other on the center back. The number, position, and overall appearance of the belt loops is up to your designing preferences.
Like what you read here? Support my site
If you want to help me continue delivering similar content, please consider buying me a coffee to keep it going. It really helps me focus and have more time to prepare these tutorials and develop my lessons.
I can devote more time and do everything involved to make this happen and share what I’ve learned about sewing and pattern-making with you.
I would really appreciate it.
Here is the video tutorial:
More sewing tutorials:
- How To Shorten Pants With Double-Folded Hem
- How to fix a torn belt loop
- How to sew an invisible zipper on a dress
- Sewing Alterations Pt.3 – Knits and Gathering
- Clothing alterations – sleeves and collar
SIGN UP FOR SEWING FOR A LIVING NEWSLETTER
If you like what you read here, join our mailing list so we can send you our new sewing tutorials, pattern-making lessons, patterns, and some occasional offers that we think might interest you!
We will protect and use your data following our Privacy policy.
You may unsubscribe at any time by clicking the link in the emails we send.