In this tutorial, I am going to share how I make these cute organza string bags that you can use for any occasion like weddings, parties, baby showers, birthday party gift bags, you name it…
Here are some string bags that I’ve already made. As you can see they can vary in size. They can also be made from any type of fabric.
Here are the instructions step-by-step. If you would rather watch the video tutorial, scroll down to the bottom of the page.

Materials you are going to need
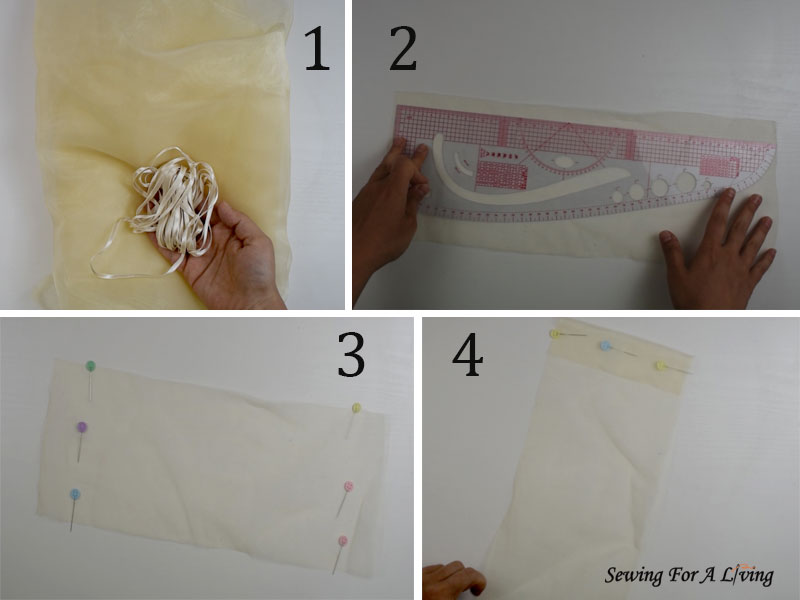
First, you are going to need the fabric, which in our case is this yellowish organza.
You are also going to need some ribbon for the ties. I’m using this ¼ “ or 5 mm wide double-faced satin ribbon (image 1).
If you prefer a wider ribbon, use it. You just need the tunnel wider. But we’ll get to that later in the tutorial.
The amount of fabric you are going to need depends on the size of the bag. For the ribbon, one yard (or one meter) would be enough to make the ties.
Cutting the organza string bag
To cut the bag, let’s start with the dimensions. I’m going to cut a rectangle that is as wide as I want the bag to be plus seam allowance on both sides (image 3).
For the height, I am going to measure twice the height of the finished bag plus 4 inches or 10 cm for the overlap. I’m going to sew 2 inches or 5 cm overlap on each side.
For example, if I want the the bag to be 5 inches wide and 6 inches tall, here is what I need to do.
For the width – 5 inches plus 1/2 inch seam allowance on each side that wold be 6 inches.
For the height – 6 inches by 2 (because the bag is folded in half at the bottom), plus 2 times the overlap of 2 inches = 4 inches. So that would be 6×2 + 2×2 = 12 + 4 = 16 inches for the height.
To summarise, for a bag that is 5 by 6 inches, you would need a rectangle of fabric that is 6 inches wide by 16 inches long.
I’ve cut the rectangle with the appropriate dimensions and I’m going to mark where the fold for the overlap would be.
I want the sides to overlap at 2 inches, so I put the pins there. I am using pins because chalk won’t stay on this see trough slippery fabric (image 3).
Then, I’m going to pin the fabric folded and remove the pins that were serving as a mark (image 4).
I also pressed it with steam to fix it in place. The organza is slippery and very thin and can be challenging to sew. That’s why I press to fix the fold in place.
Sewing the organza string bag
I am using a very thin needle. It’s European size 70 which corresponds to US size 10. This makes all the difference.
If you are using a thicker needle, you might get skipping stitches or the machine might not be able to sew the fabric at all.
Next, I’m going to sew two perpendicular lines close to the edge of the fold to form a tunnel for the ribbon ties.
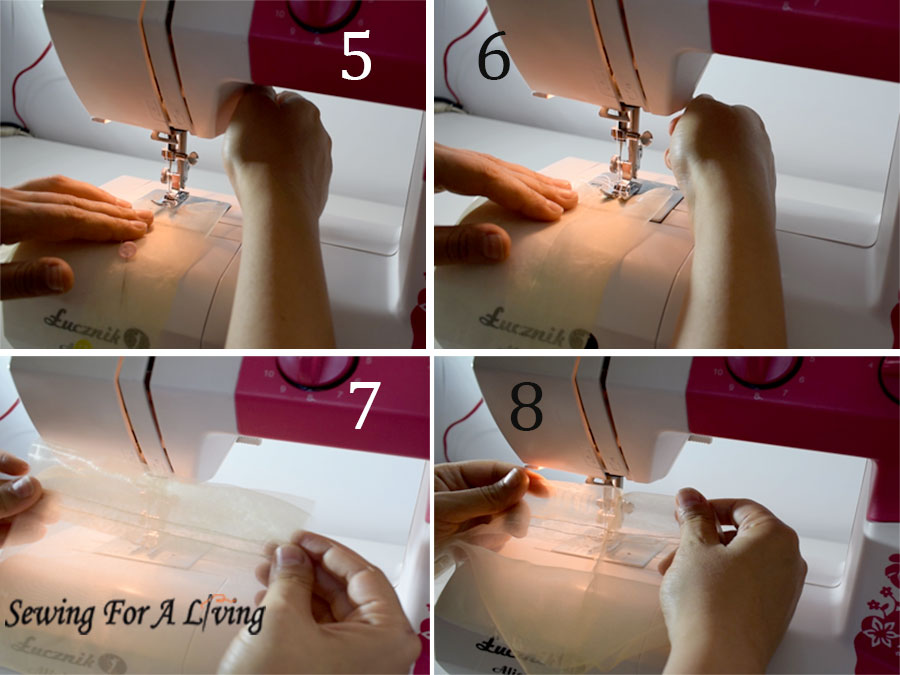
I’m going to sew the first line close to the edge with a small seam allowance (image 5).
Then, I’m going to sew the second line using the edge of the presser foot as a guide (image 6). This way the width of the tunnel is going to be just a bit wider than ¼ inch which is enough for the ribbon to fit in.
If you are using a wider ribbon, you are going to make the tunnel wider.
Then, I do the same on the other side. I’m being careful to sew the lines exactly where I’ve sewn them on the other side. This way they will match later when I make the side seams of the bag (image 7).
Now I need to make the side seams. I’m gonna fold the bag in half, right sides together and I’m gonna carefully match the seam lines to form the tunnel for the ribbon (image 7).
Then, I sew the side seams with a small seam allowance, because it’s going to show on the face side as the fabric is see-through. But not too small because I don’t want the fabric to unravel later. I am locking the stitch at the beginning and the end.
I repeat with the other side.
I am checking how I’ve done and my seams seem to align nicely so I’m going to continue with the strings (image 8).
Inserting the strings
The way the strings are inserted is interesting because it allows the tie to close the bag when pulled and open the bag when stretched.
It took me a while to figure out how to put the ribbon in so that I can achieve this effect. Here is how to do it yourself.
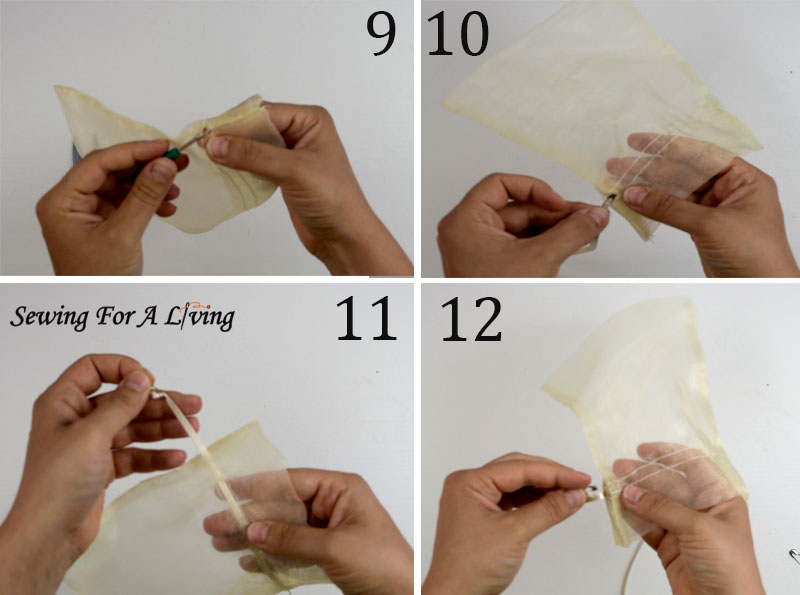
You can use the clippers or a seam ripper to open a small hole close to the side seam. The hole should be restricted by the stitching lines of the tunnel. Cut only through the top layer of fabric (image 9).
Repeat on all 4 ends of the tunnel, close to the side seam.
I am using a small safety pin to help me get the ribbon through the tunnel. If you don’t have one around, you can also use a paper clipper.
I pin the end of the ribbon and push the safety pin through one of the holes (image 10).
Then I push and pull until I get the pin through the next hole (image 11).
Insert it back in the next hole and go through the other side of the tunnel (image 12).
When you are done, the ends of the ribbon must come out on the same side (image 13). You can measure and cut the length of the ribbon before you insert it. I like to eyeball it and cut after I’ve inserted it.
Remove the safety pin (image 14). Tie both ends of the ribbon in a knot (image 15).
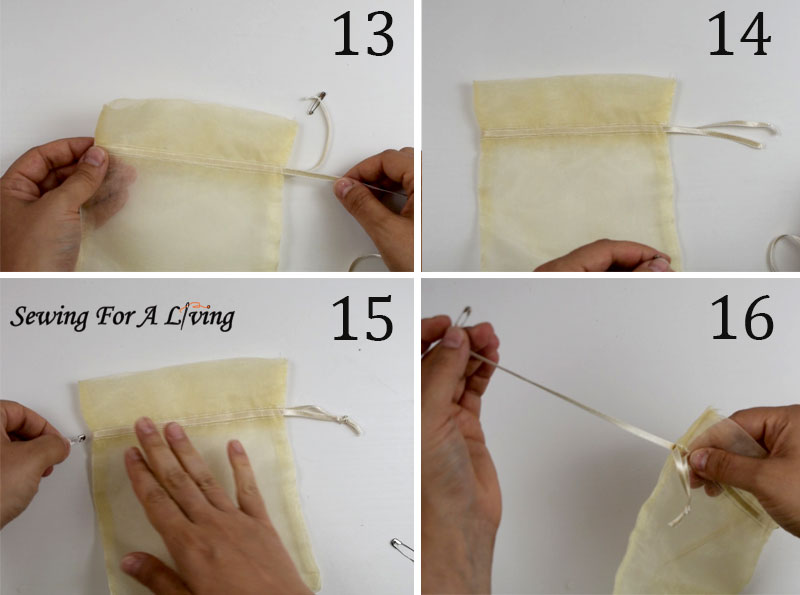
Repeat with the other side. With the help of the safety pin, insert the ribbon on the other side (image 15).
Take it out from the second hole (image 16) and put it back in through the third (image 17). Push and pull until you reach the last hole (image 18).
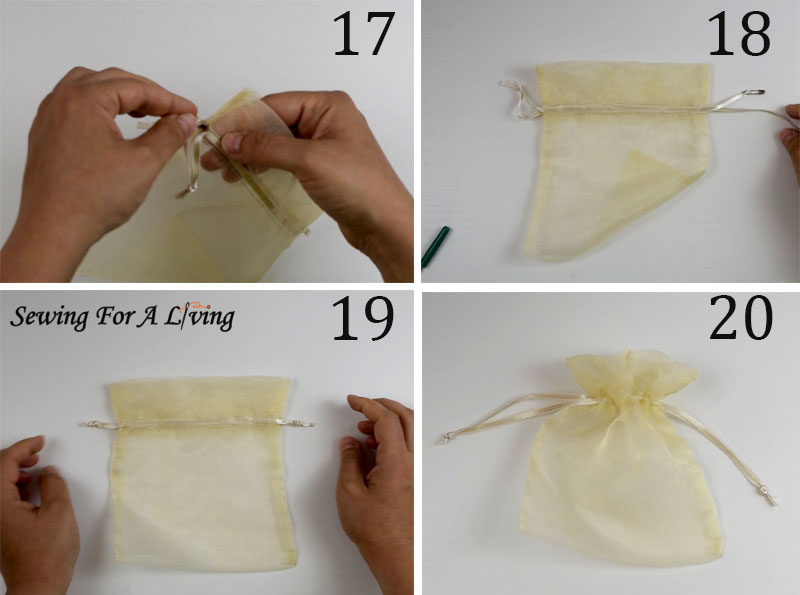
Tie a knot on this side as well (image 19).
Adjust the ribbon as it might get a bit displaced while you insert the second tie.
And, let’s see how I’ve done. The string bag closes nicely and I’m pretty happy with the result (image 20).
I’ve also sewn a couple for prom from the main fabric of the dress to wear on the wrist. What I like to do with these is to twist the ribbon so that the knots hide into the tunnels.
Watch the video tutorial:
Like what you read here? Support my site
If you would like to help me continue delivering similar content, please consider buying me a coffee to keep it going. It really helps me focus and have more time to prepare these tutorials and develop my lessons.
I can devote more time and do all the things involved in order to make this happen and share with you what I’ve learned about sewing and pattern making.
I would really appreciate it.
More sewing tutorials:
- How to sew a pillowcase
- How to fix torn jeans pockets
- How to replace elastic in swimwear
- How to sew an invisible zipper on a dress
- Sewing with elastic thread – make a shirred dress
SIGN UP FOR SEWING FOR A LIVING NEWSLETTER
If you like what you read here, join our mailing list so we can send you our new sewing tutorials, pattern making lessons and patterns, as well as some occasional offers that we think might interest you!
We will protect and use your data in accordance with our Privacy policy.
You may unsubscribe at any time by clicking the link in the emails we send.